
Why you’ll love this recipe:
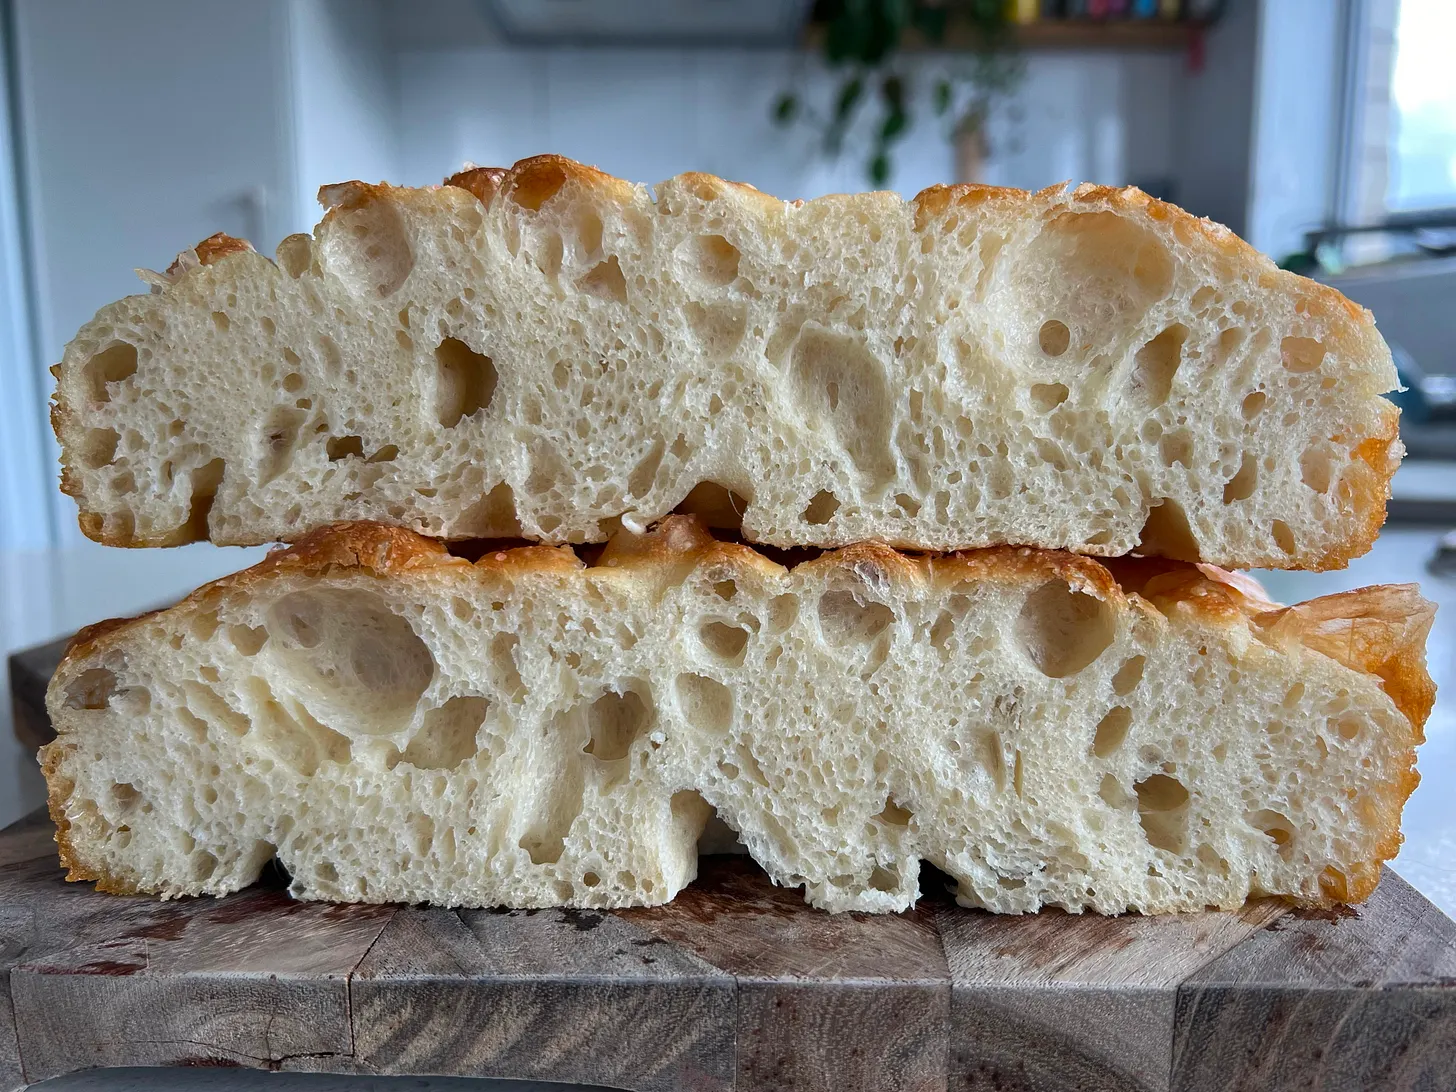
Focaccia has to be the BEST bread of all time! It’s crispy and golden on the outside, fluffy and airy on the inside, and best of all – it’s SO EASY TO MAKE! One of my favourite things about focaccia dough is just how versatile it is. It makes the most incredible sandwich bread, is delicious dipped into olive oil, can be topped with just about anything, or simply enjoyed warm with a sprinkle of flaky sea salt.
The secret to this beautifully light and fluffy focaccia is the cold proof. Allowing the dough to ferment slowly in the fridge develops incredible flavour while creating those signature air bubbles and that soft, chewy texture we all love. Although the dough needs a nice long rest, the hands-on time is minimal, making it the perfect bread to prepare the day before.
Best of all, this is a no-knead focaccia recipe. The dough comes together with nothing more than a fork, so you don’t need any fancy equipment or bread-making experience. If you’ve always been intimidated by baking bread, this is the recipe to start with!
Once you’ve mastered this recipe, the possibilities are endless. Bake it in different-sized trays depending on whether you’re making sandwiches or serving a crowd, and have fun experimenting with toppings and flavours. From classic rosemary and flaky sea salt to roasted garlic, olives, tomatoes or caramelised onion, this dough is the perfect base to make your own.
It’s so simple that even my ‘non-baker’ fiancé makes it—and if he can make it, you definitely can too!


Recipe FAQs:
NO!! Your dough will be sticky because of the high hydration percentage. If you are struggling with really sticky dough at any point there are 2 things you can do:
- Grease your finger tips with olive oil, this will stop the dough sticking to your fingers and make it much easier to handle.
- Allow the dough to rest. You will notice after the first 15 minute proof (before adding in the olive oil) that the texture of the dough changes drastically. When you give the gluten a chance to relax it becomes much easier to work with.
Yes! High grade flour has a slightly higher protein percentage than plain flour which helps to give bread that beautifully chewy texture, however you can absolutely substitute it with plain flour.
You can actually leave the dough in the fridge for up to 3 days! In fact, I find leaving the dough in the fridge for 2 nights creates the perfect bubbly, chewy focaccia, but who really wants to wait that long???
Yes you can use any sized tray or tin you like! I used a 23cm x 28cm baking tin but you can use any shape or size you like, you will just need to adjust the cooking time. It’ll need less cooking time if you use a larger tray and more time if you use a smaller tray.
OH HELL YES! You can jazz up your focaccia in any way you like. The best time to add topping or flavours is usually when dimpling your dough before baking. A common flavour is sea salt and rosemary or I love cherry tomatoes and garlic cloves. I will do more posts on flavour combinations soon!
Storage:
Store in an air tight container for up to 3 days or in the freezer for up to 3 months. Focaccia is always best eaten on the day of baking, but popping it into a hot oven for a few minutes really brings it back to life on subsequent days. If frozen, fully defrost then heat in the oven.
💕 Loved this recipe? 💕
If you loved this recipe I would absolutely love you to tag me on Instagram and feel free to leave a review below 🥰

Easy (NO KNEAD) Overnight Focaccia
Ingredients
- 400 g warm water
- 1 tsp sugar any sugar is fine
- 4 g instant dried yeast approx 1 tsp
- 1 tsp salt
- 500 g high grade flour
- A generous glug of olive oil 1-2 tbsp + extra for drizzling into the tray
- sprinkle of sea salt optional
Instructions
- Pour the warm water into a large bowl and stir in the sugar. The sugar acts as food for the yeast. Sprinkle the yeast over the top of the water and leave to ferment for 5 -10 minutes.
- Whisk briefly before adding in the salt and plain flour. Mix with a spoon/fork until all the flour has been incorporated, the dough will be very sticky at this stage. Cover with a tea towel and rest for 10-15 minutes.
- Drizzle with a generous glug of olive oil and incorporate. The best way to do this is to coat your fingertips with oil and fold the dough in on itself until the oil has just been incorporated, it shouldn’t take more than a minute or two. Shape the dough into a ball by tucking the bottom under, and place it back into the bowl (if it is super sticky, you can drizzle your hands and the outside of the dough with extra oil). Cover the bowl tightly with glad wrap and place into the fridge overnight. It is important to wrap your bowl tightly, if there are any gaps it can cause a crusty skin to form on the outside of your dough.
The following day
- Generously grease your baking tray/dish with olive oil. Shape the dough back into a ball by tucking the bottom of the dough in on itself. Pop the dough into the tray, toss it in the oil to fully coat and firmly press it into the shape of the tray. Don’t worry if it doesn’t reach the edges, we just want to help it rise evenly into the tray. Cover tightly with glad wrap and leave in a warm place for an hour or until the dough is at room temp and has doubled in size.
- Preheat your oven to 220°C.
- Once the dough has proofed, drizzle it generously with oil again. Dab your finger tips into the oil to grease them, then press firmly into the dough to create dimples. This helps get that delicious olive oil down into the bread and to create a nice levelled bake. Use a knife or bench scraper to cut down the edges of the dough, this helps ensure there is a layer of oil between the dough and the sides of the tray, giving it a lovely crispy crust.
- Sprinkle with sea salt, then bake for 25 minutes or until golden and crispy. Allow to cool for 5-10 minutes in the tray, then transfer to a wire rack to cool completely. Slice and enjoy.
Video
Notes
- Don’t be shy with the olive oil, if at any point the dough is sticking to your fingers you can add a little more!
- I used a 23cm x 28cm baking tin but you can use any shape or size you like you may just need to adjust the cooking time. It’ll need less time if you use a larger tray and more time if you use a smaller tray.
- You can actually leave the dough in the fridge for up to 3 days! In fact, I find leaving the dough in the fridge for 2 nights creates the perfect bubbly, chewy focaccia, but who really wants to wait that long???



Leave a Reply