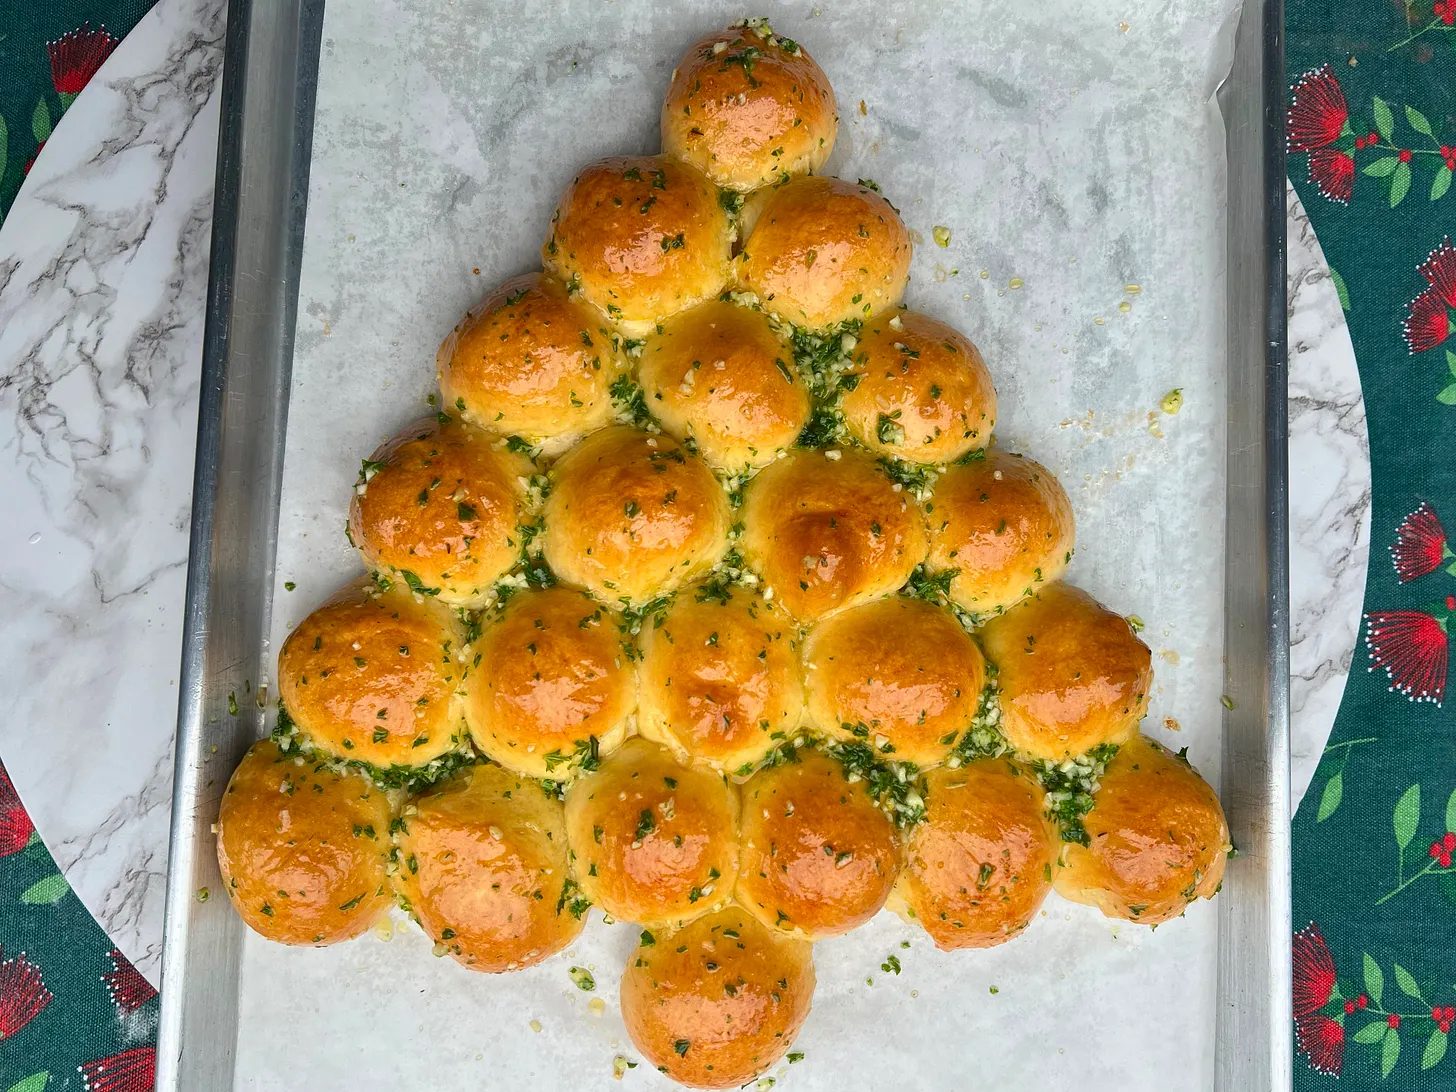
Soft, fluffy brioche buns brushed with a generous amount of garlic and parsley butter. This Garlic Butter Pull Apart Christmas Tree is the ultimate festive centrepiece for your Christmas table!
There is something about a pull-apart bread that makes it impossible to resist, and this Pull Apart Christmas tree is no exception! We’re talking soft, pillowy little brioche buns, baked together into the cutest Christmas tree shape and absolutely drenched in a delicious garlic and parsley butter.
It’s fun, festive and surprisingly easy to make. Pop it in the middle of your Christmas table as a starter, serve it alongside your Christmas mains or add a few bowls of your favourite dips for everyone to dig into. Just be warned, these little buns disappear FAST!

Why you’ll love this garlic butter pull apart Christmas tree
- It’s SO festive! A giant Christmas tree made entirely of fluffy little bread rolls. What’s not to love?
- Soft and fluffy brioche: These buns are buttery, pillowy and deliciously soft on the inside.
- Loaded with garlic butter: Brushed generously with melted garlic and parsley butter straight out of the oven.
- Perfect for sharing: Everyone can pull off their own little bun. No slicing or serving required!
- Easier than it looks: The dough is simple to make, and shaping it into a Christmas tree is as easy as rolling little balls.

Tips for making the perfect pull apart bread
- Don’t use milk that’s too hot. You want your milk to be just above room temperature. If it’s too hot, it can kill the yeast and stop your dough from rising properly.
- Give the dough enough kneading time. Brioche is a fairly rich, sticky dough, so it’s important to knead it until smooth and elastic. Don’t rush this step!
- Make your buns evenly sized. Weighing the dough and dividing it into 22 portions helps make sure all the buns bake evenly.
- Don’t skip the second rise. This is what gives you those lovely soft, fluffy buns. They should look noticeably puffier before going into the oven.
- Brush with garlic butter while hot. The warm buns soak up all that delicious melted butter, making them extra tasty!

How to make garlic butter pull apart Christmas tree
1. Make the brioche dough
Pour the warm milk into the bowl of your stand mixer. Add the sugar and yeast, whisk briefly with a fork and leave to stand for 5–10 minutes until the yeast starts to look foamy on top.
Whisk in the egg yolk, then add the flour and salt. Mix briefly to bring everything together before kneading with the dough hook on a low speed for a couple of minutes.
Add the softened butter and continue kneading for 10–15 minutes, or until the dough is lovely and smooth. You’ll know it’s ready when the dough starts to pull away from the sides of the bowl, picking up all those sticky bits and leaving the bowl looking much cleaner.
The dough should feel soft and silky. You should be able to touch it without it sticking all over your fingers. If it’s still really sticky, give it a little more kneading time.
2. First rise
Scrape the dough off the dough hook and shape it into a ball. Place it into a lightly greased bowl, cover tightly with glad wrap and leave somewhere warm to rise for approximately 45 minutes, or until doubled in size.
I like to pop mine in the airing cupboard, but anywhere warm but out of direct sunlight will do the trick. Make sure the bowl is covered tightly so the surface of the dough doesn’t dry out and form a skin.


3. Shape your Christmas tree
Once the dough has risen, tip it out onto a clean work surface. You shouldn’t need any extra flour.
Divide the dough into 22 even portions. You can absolutely do this by eye, but I like to weigh the whole ball of dough and divide the weight by 22 so that all my little buns are the same size.

Roll each portion into a tight little ball and arrange them on a baking tray lined with baking paper in a Christmas tree formation:
- Top row: 1 bun
- Second row: 2 buns
- Third row: 3 buns
- Fourth row: 4 buns
- Fifth row: 5 buns
- Sixth row: 6 buns
- Trunk: 1 bun

You want the buns to sit fairly close together but not quite touch just yet, as they’ll need a little room to rise.
4. Second rise
Loosely cover the buns with glad wrap and leave to rise for another 45 minutes, or until they’ve puffed up and jiggle slightly when you gently shake the tray.
While the buns are rising, preheat your oven to 180°C fan bake.
Once risen, gently brush the surface of the buns with the reserved egg white. Bake for approximately 20 minutes, or until beautifully golden brown.

5. Make the garlic butter
While the buns are baking, add the butter, finely chopped garlic and parsley to a small saucepan.
Gently heat until the butter has melted and the garlic starts to smell lovely and fragrant. You can also do this in a small microwave-safe bowl if you’d prefer.
6. Brush with garlic butter and serve!
As soon as the buns come out of the oven, generously brush them all over with your garlic butter. Don’t be shy here! Finish with a little sprinkle of flaky sea salt.
Allow to cool for 5–10 minutes before serving warm. Pop the whole Christmas tree in the middle of the table and let everyone pull apart their own little bun!
Recipe FAQs:
Absolutely! Brioche dough is quite sticky, which is why I find a stand mixer with a dough hook MUCH easier, but don’t let not having one stop you.
You can knead the dough by hand on a clean work surface. Try to use the heel of your hand to push the dough away from you, fold it back over itself and repeat. It will feel sticky to begin with, but as you continue kneading, the dough will become smoother and less sticky. A bench scraper is also really handy for gathering up any dough that sticks to your work surface. YOU GOT THIS!
Yes! You can make the dough the day before and allow it to rise slowly in the fridge overnight. Cover the bowl tightly with glad wrap and refrigerate after kneading. The next day, allow the dough to come towards room temperature before shaping into your little buns. Continue with the second rise as per the recipe.
Fresh parsley gives the garlic butter the best flavour and colour, but you can use dried parsley if that’s what you have on hand. Just use a smaller amount as dried herbs have a more concentrated flavour.
Yes! These buns are best enjoyed fresh, but you can freeze any leftovers once cooled completely. Store in an airtight container or freezer bag for up to 2 months. Defrost and warm gently in the oven before serving. You can also brush with a little extra garlic butter to freshen them up!

Storage:
Look it’s very unlikely that you will have any buns left that you need to store, but if you do happen to have any left overs, store them in an airtight container at room temperature for 1-2 days. This Pull Apart Christmas Tree is best enjoyed fresh.
💕 Loved this garlic butter pull apart Christmas tree? 🎄
If you loved this recipe I would absolutely love you to tag me on Instagram and feel free to leave a review below 🥰

Garlic Butter Pull Apart Christmas Tree
Ingredients
Brioche Dough
- 240 g warm milk just above room temperature
- 4 g instant dry yeast ~1 tsp
- 1 tsp sugar or honey
- 1 egg yolk save the egg white for brushing the buns
- 380 g plain flour
- 1 tsp salt
- 50 g butter softened
Garlic Butter
- 1 tbsp parsley finely chopped
- 2 large cloves of garlic finely chopped
- 50 g butter
- pinch of sea salt
Instructions
Prepare the brioche dough
- Pour the milk into the bowl of your stand mixer*, add in the sugar and yeast, whisk briefly with a fork, then allow to stand for 5-10 minutes until it begins to look foamy on the top.
- Whisk in the egg yolk. Add in the salt and flour, bring together with your fork, then knead using the dough hook attachment on low for a couple of minutes then add in the butter.
- Allow the dough to knead for 10-15 minutes or until the dough is looking lovely and smooth and starting to ‘clean’ the sides of the bowl.
- Once kneaded, scrape the dough off the dough hook and shape it into a ball, place into a clean bowl greased with a little oil or butter. Cover the bowl with glad wrap and place somewhere warm to rise for 45 minutes. (I like to pop it in my airing cupboard, if you live in a colder climate and don’t have a cozy airing cupboard to pop it in allow it to proof until it has doubled in size). Make sure the bowl is wrapped super tightly as any air coming in can cause the dough to form a skin on the surface.

Shape the buns
- Tip the risen dough out onto your clean work surface (you shouldn’t need any flour). Cut the dough into 22 even portions, you can absolutely just do this by eye but I like to weigh my whole ball of dough then divide it by 22 and weigh each little ball to make them perfectly even.
- Roll each portion into tight little balls and place them onto a tray lined with baking paper in a pyramid formation to look like a Christmas Tree. (1,2,3,4,5,6,1) . The balls should be close together but not touching at this point as they will need room to rise.

- Cover loosely with glad wrap and allow to rise for 45 minutes, or until the balls haven risen, are touching and jiggle when you wiggle the tray.

Bake the buns
- Preheat the oven to 180˚C fan bake while the buns rise. Once the buns have risen, brush the buns with reserved egg white, then bake for approximately 20 minutes or until the buns are golden brown.
Prepare the garlic butter
- While the buns are baking, place the butter, garlic and parsley into a small pot and melt together until the butter has just melted and the garlic begins to get fragrant (you could also do this in a small bowl in the microwave).
- As soon as the buns come out of the oven, brush them generously with the garlic butter and sprinkle with sea salt. Allow to cool for 5-10 minutes then serve warm!

Notes
More Christmas recipes you’ll love…


Leave a Reply